Introduction:
Migrating mailboxes is a crucial task for organizations, ensuring seamless transitions between email platforms while maintaining data integrity. However, migrations aren’t always smooth sailing. Bad items, such as corrupted emails or problematic attachments, can hinder the process. In this guide, we’ll delve into the intricacies of mailbox migration, focusing on handling bad items effectively to ensure a successful transition.
Understanding Bad Items: Before diving into the migration process, it’s essential to grasp the concept of bad items. These are email messages, contacts, or calendar entries that fail to migrate properly due to various reasons, including corruption, size limitations, or unsupported formats. Ignoring bad items can lead to data loss and workflow disruptions, making their resolution imperative.
Preparation Steps:
- Assess your current email environment: Evaluate the source email system, identifying potential issues such as large attachments or known corruption issues.
- Backup: Prior to migration, create a comprehensive backup of your mailbox data. This serves as a safety net in case of any data loss during the migration process.
- Analyze bad item reports: If available, review any previous migration reports to identify patterns or recurring issues related to bad items.
After the mailbox sync with 100% but have some bad items and status is:
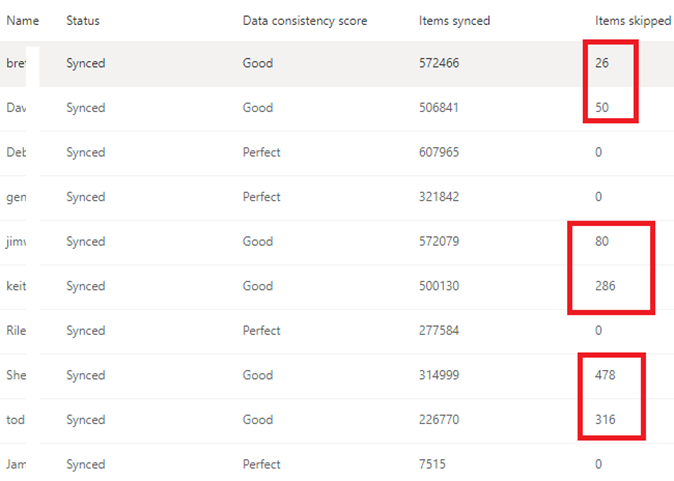
- When Data consistency score is Good:

- Click on the migration batch that have Good data consistency and you will be able to see the Bad Items skipped status:


Now when you will try to complete the migration batch it will look for approver to approve, wherein definitely nobody knows who the approver is. Microsoft have this option to avoid of deleting bad items emails unknowingly during the migration.
Sometime this is really a pain to finish/complete the batch from GUI, but I would recommend doing it via Exchange Online PowerShell.
To finish/complete a specific Mailbox in a Batch run the below PowerShell command in Exchange online PowerShell:
Skip the bad items using the Set-MoveRequest and -SkippedItemApprovalTime switch. After running the cmdlet, a synchronization will occur, and the mailbox will complete.
Set-MoveRequest -Identity “Harish” -SkippedItemApprovalTime $(Get-Date).ToUniversalTime()
To complete the Migration batch completely and skip the bad items:
Set-MigrationBatch -Identity “O365Cloudit” -ApproveSkippedItems
Complete-MigrationBatch -Identity “O365Cloudit”
Conclusion: Mailbox migration with bad items presents unique challenges, but with proper planning and execution, these obstacles can be overcome. By understanding the nature of bad items, preparing adequately, and employing effective migration strategies, organizations can ensure a seamless transition to a new email platform while safeguarding data integrity and minimizing disruptions. Remember, meticulous attention to detail and proactive problem-solving are key to achieving a successful mailbox migration.
!!! THANKS FOR READING !!!
Regards,
HARISH KUMAR
Knowledge is not a finite resource to hoard; it’s a boundless treasure that grows when shared.