In the realm of Active Directory management, maintaining a streamlined and efficient infrastructure is paramount. Whether you’re consolidating servers, decommissioning outdated hardware, or optimizing network performance, demoting a domain controller requires careful planning and execution to ensure minimal disruption to your organization’s operations.
Understanding Domain Controller Demotion
A domain controller in Active Directory plays a crucial role in authenticating and authorizing all users and computers within a domain. Over time, as infrastructure needs evolve or hardware reaches the end of its lifecycle, demoting a domain controller becomes necessary. This process involves removing Active Directory Domain Services (AD DS) from a server, effectively reversing its role from a domain controller to a member server or standalone server.
Key Considerations Before Demotion
Before initiating the demotion process, it’s essential to consider several factors to mitigate risks and ensure a smooth transition:
- Assess Dependencies: Identify any services or applications reliant on the domain controller to avoid unintended disruptions.
- Verify Replication: Confirm that Active Directory replication is healthy across all domain controllers to prevent data loss or inconsistency.
- Backup: Perform a comprehensive backup of Active Directory, including system state data, to safeguard against potential data loss during demotion.
Step-by-Step Guide to Demoting a Domain Controller
Step 1: Prepare for Demotion
- Verify Permissions: Ensure the account used for demotion has adequate permissions, typically requiring Enterprise Admin or Domain Admin credentials.
- Check FSMO Roles: Confirm that no FSMO roles are hosted exclusively on the domain controller slated for demotion. If so, transfer these roles to another domain controller.
Follow my other blog where I have mentioned how to Transfer FSMO roles from 1 DC to another domain controller:
How to Transfer FSMO roles to another Domain Controller – 365 CloudIT
After the above steps are done then stop the replication from demoting DC to another using below command:
repadmin /options DC03 +DISABLE_INBOUND_REPL
repadmin /options DC03 +DISABLE_OUTBOUND_REPL
Note: I am Demoting DC03
Step 2: Demotion Process
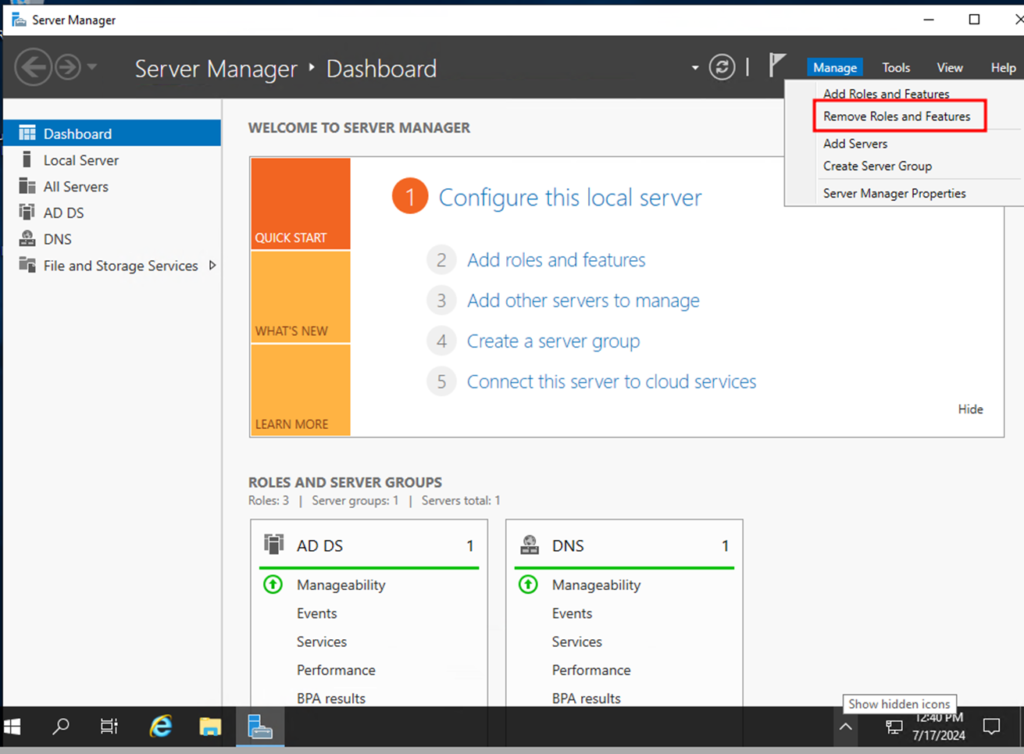
- Using GUI: Navigate to Server Manager > Manage > Remove Roles and Features > Active Directory Domain Services to initiate demotion.
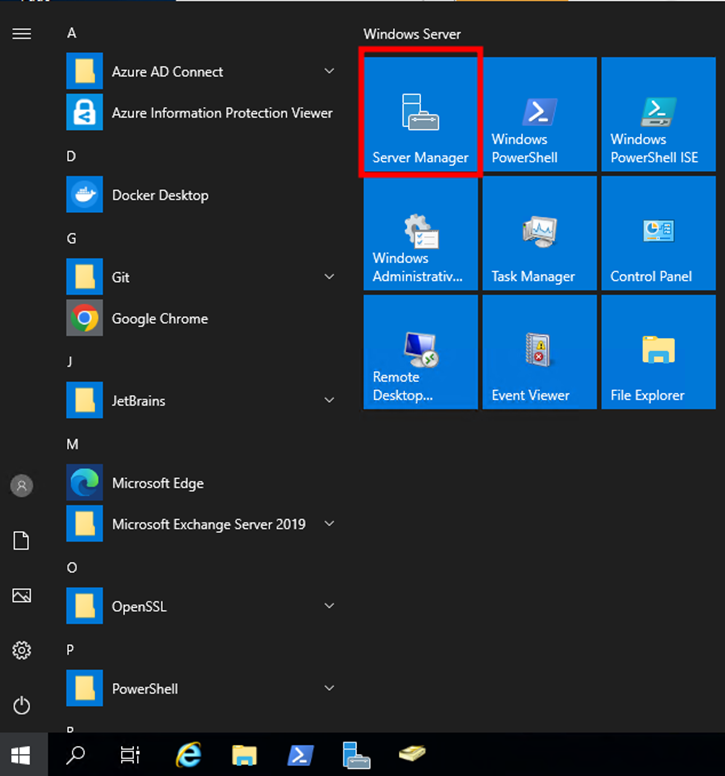
Open Server Manager:
Click on the Manage > Remove Roles and Features
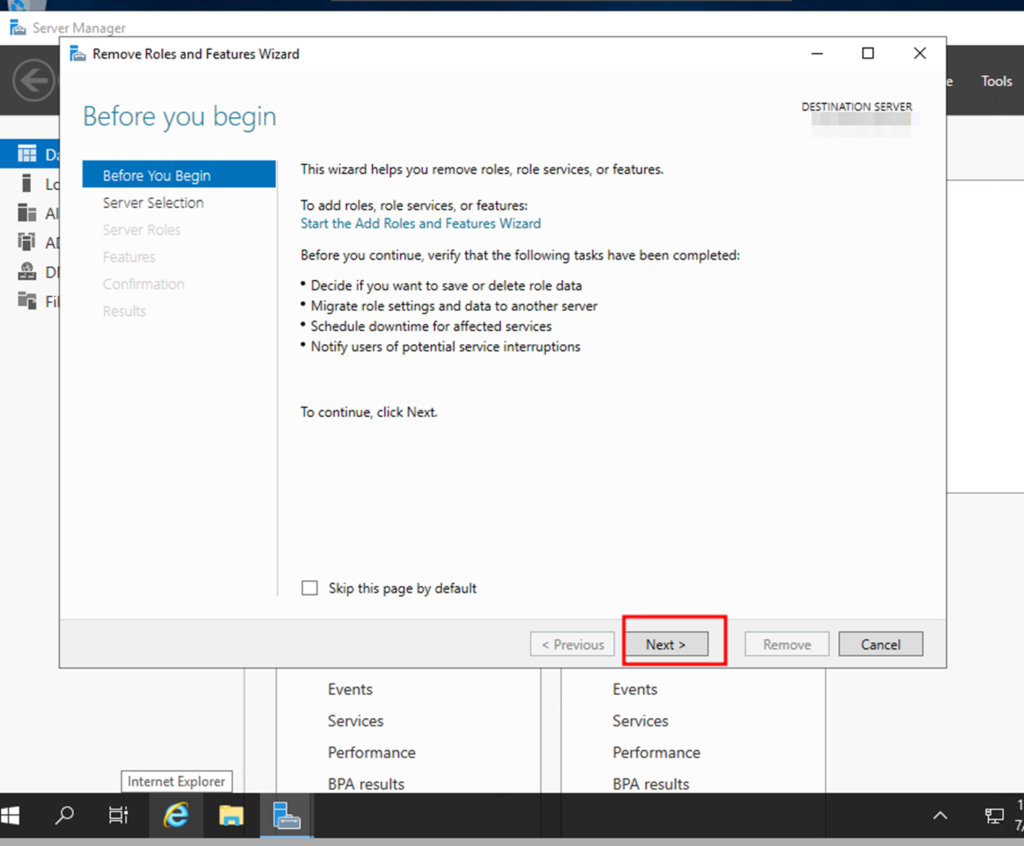
Now new window will appear, click next to see the server:
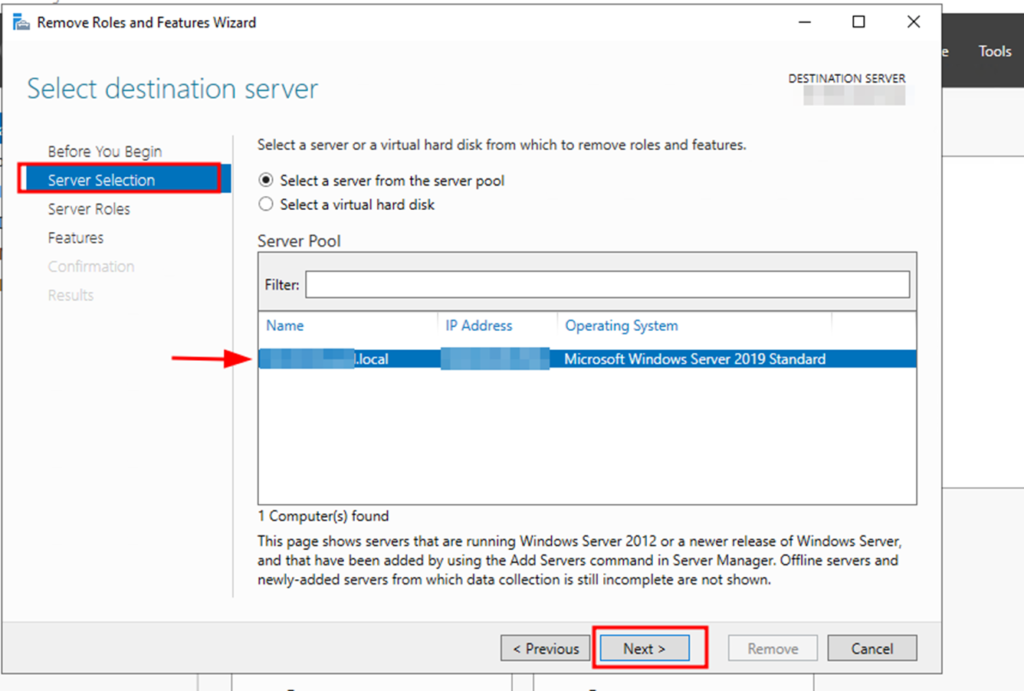
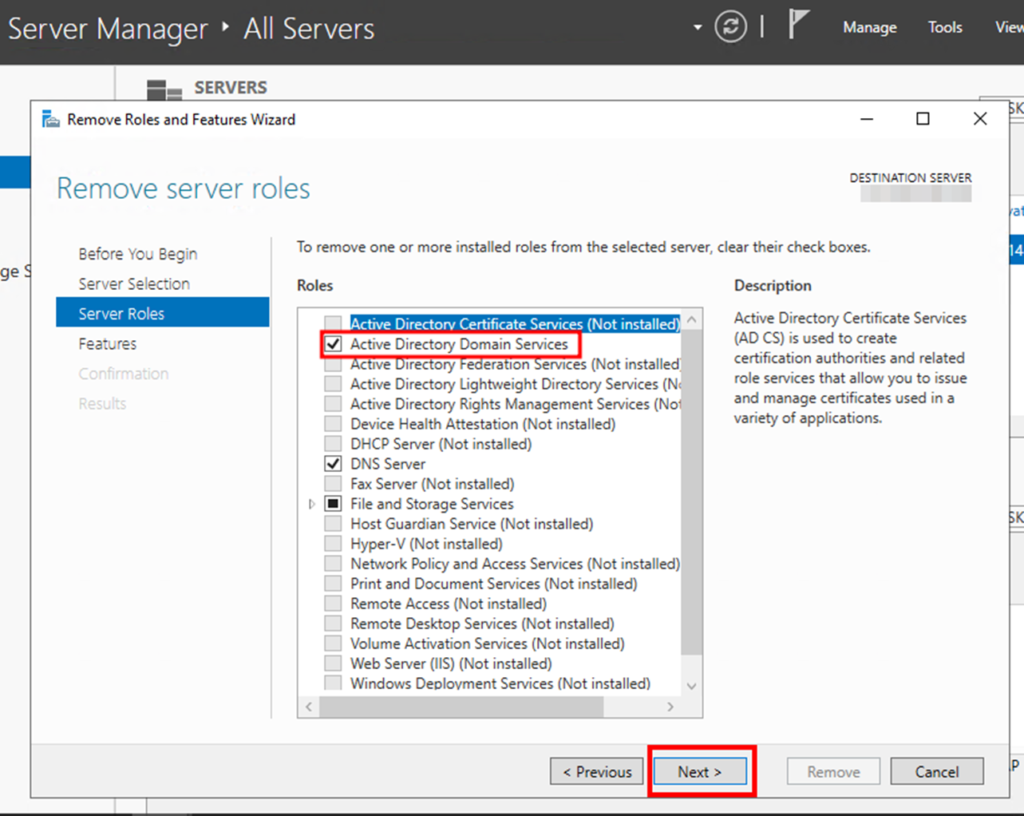
Click on the below option as per the image and select which DC are you Demoting and then click Next:
Make sure ADDS is selected and then click next along with DNS:
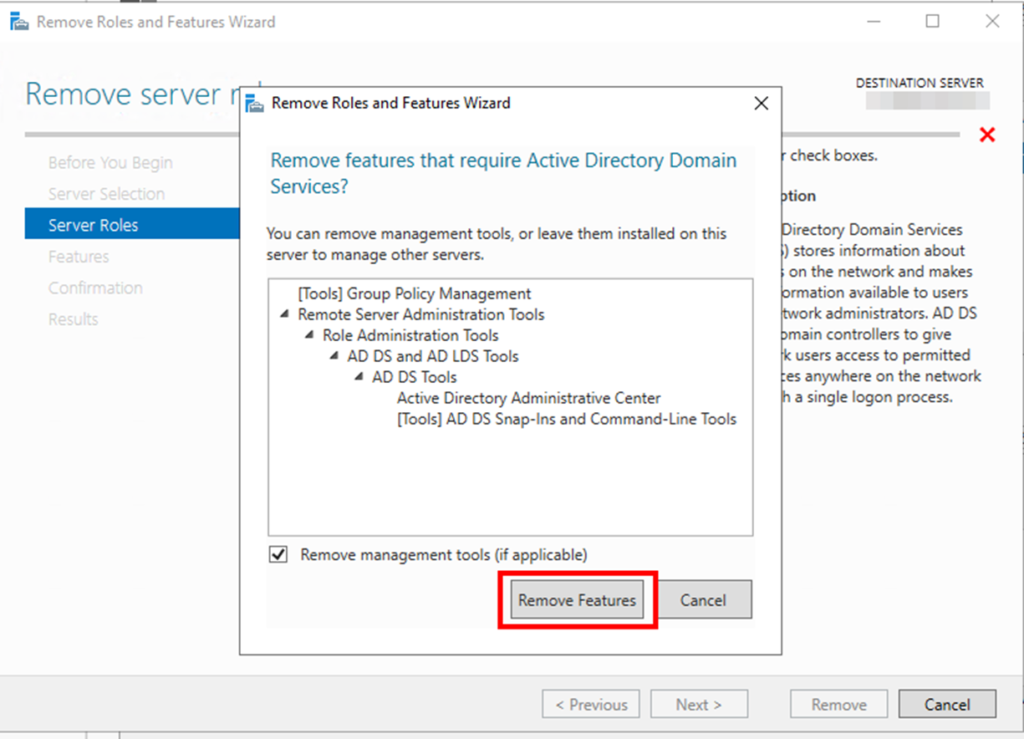
Now new pop up will appear to confirm to remove the features:
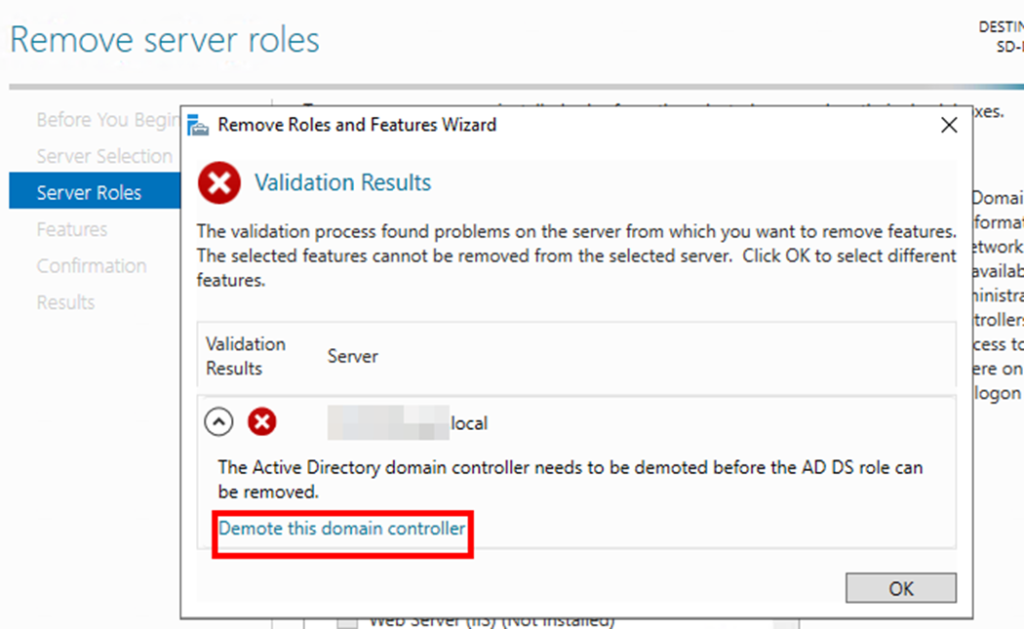
Now click on Demote this Domain Controller:
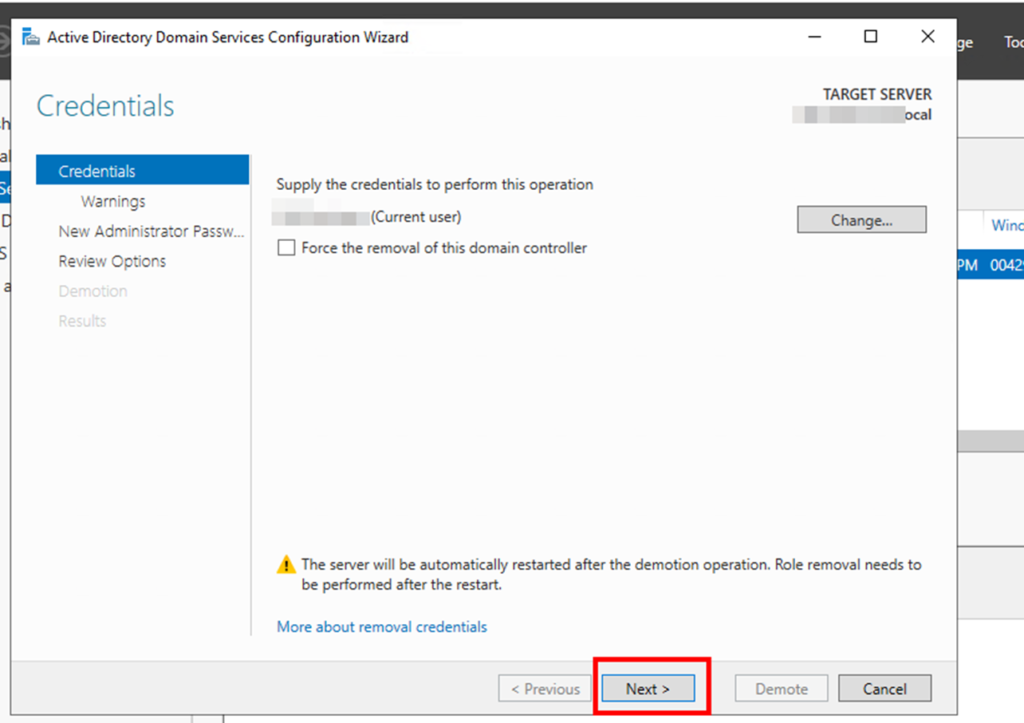
Now Click Next, On the next screen make sure you DO NOT select “Force the removal of this domain controller”.
You should only select this if you are removing the last domain controller in the domain.
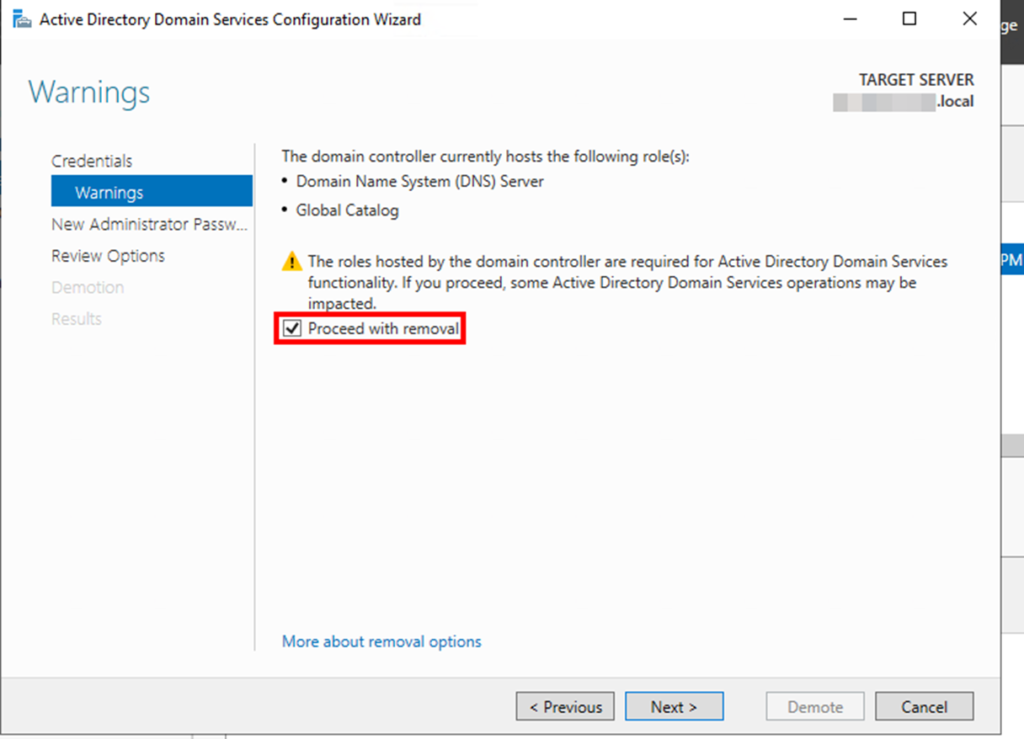
On the warnings screen, it will give you a warning this server hosts additional roles. If you have client computers using this server for DNS, you will need to update them to point to a different server since the DNS role will be removed.
Check the box “Proceed” with removal and click next
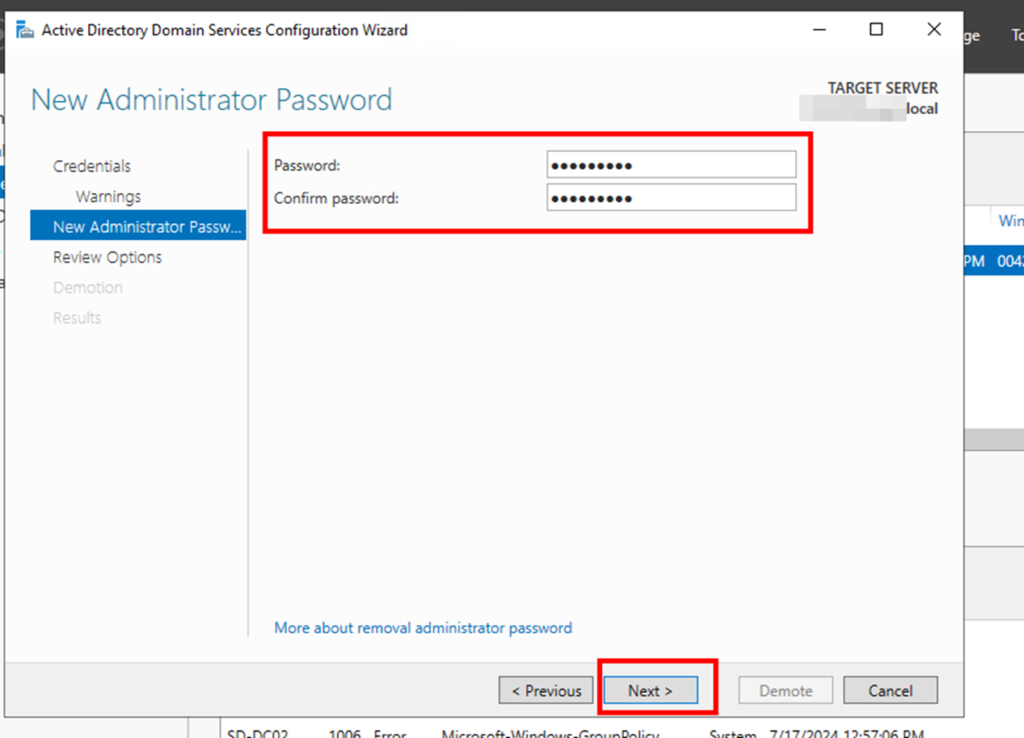
Now put in the new administrator password. This will be for the local administrator account on this server.
Now click Demote the server and it will be demoted and rebooted. Once it reboots the server will be a member server. You can log in with domain credentials to the server.
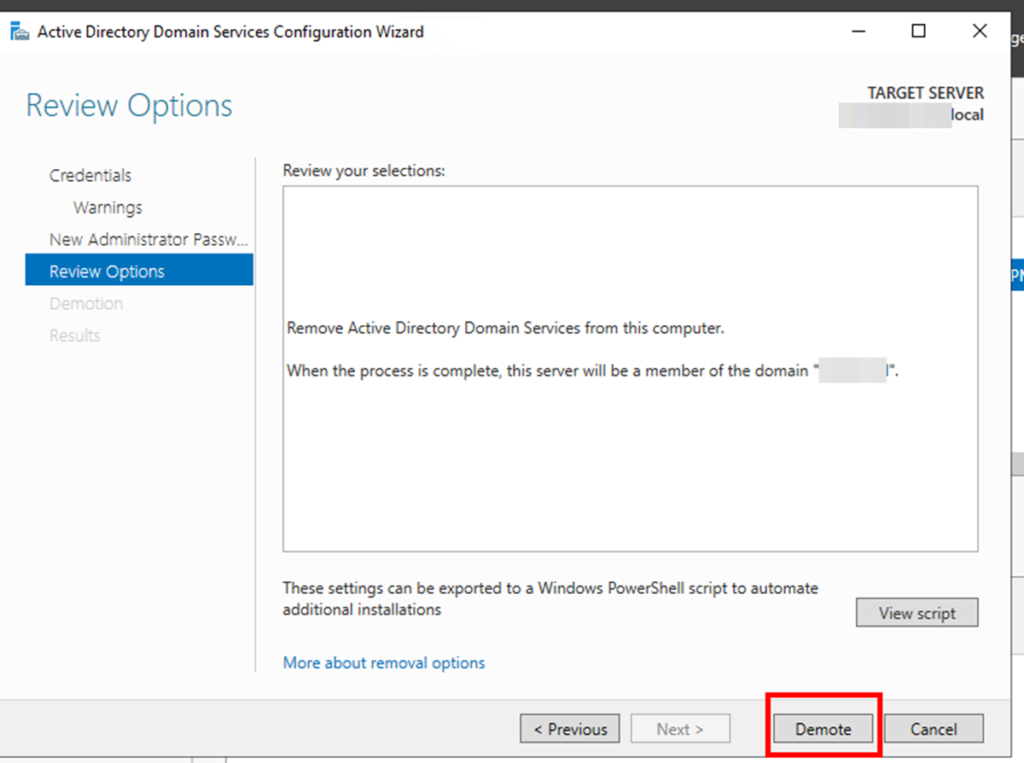
- Using PowerShell: All the process can be done via PowerShell Script, which you can get it from the View Script option shows in above Picture.
Execute PowerShell cmdlets (Uninstall-ADDSDomainController) to demote the domain controller programmatically.
Step 3: Post-Demotion Tasks
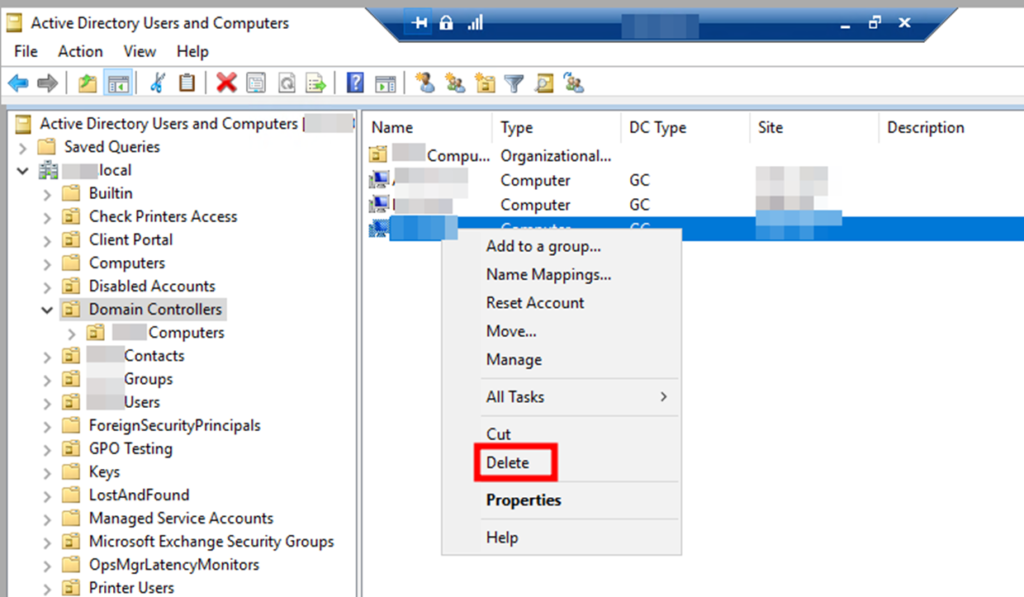
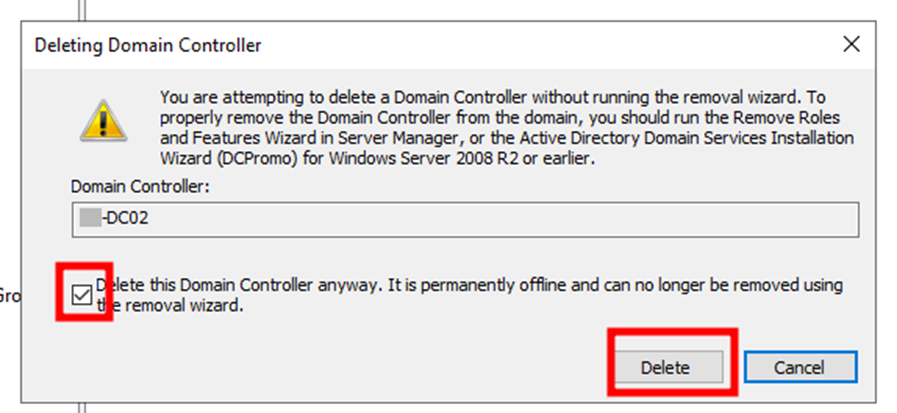
- Cleanup Metadata: Remove any remaining metadata for the demoted domain controller from Active Directory using tools like Active Directory Users and Computers or PowerShell (Remove-ADDomainController).
Remove Server from Active Directory Sites and Services.
Remove server from Active DC by going into the location as shown in below picture.
- Verify DNS Records: Ensure DNS records associated with the demoted domain controller are updated or removed to maintain DNS integrity.
- Go to Active Directory sites and services and update the subnets to active DC.
Best Practices for a Successful Demotion
- Plan: Create a demotion plan outlining roles, responsibilities, and timelines to streamline the process.
- Communicate: Notify stakeholders and IT teams about the demotion schedule to minimize operational disruptions.
- Monitor: Monitor Active Directory replication and DNS functionality post-demotion to address any issues promptly.
Conclusion
Demoting a domain controller in Active Directory is a strategic maneuver aimed at optimizing network efficiency and security. By adhering to best practices and leveraging expert guidance following this Blog, IT administrators can navigate the complexities of domain controller demotion with confidence. This ensures continuity of services while aligning with organizational goals for IT infrastructure management.
For comprehensive insights and a step-by-step demotion guide, visit ActiveDirectoryPro.com. Empower your IT team today to achieve seamless Active Directory management and maintain a robust network environment.
!!! THANKS FOR READING !!!
Regards,
HARISH KUMAR
Knowledge is not a finite resource to hoard; it’s a boundless treasure that grows when shared.