This blog is going to be very interesting for those who would like to know how to configure BitTitan for
What is Microsoft 365 cross Tenant Migration?
Microsoft 365 cross-tenant migration typically refers to the process of moving data and services from one Microsoft 365 (formerly Office 365) tenant to another. A tenant in Microsoft 365 is essentially a dedicated instance of the service for an organization, and it includes things like user accounts, email, SharePoint sites, OneDrive for Business, and other related services.
Now, what is BitTitan tool?
BitTitan is a company that provides cloud services enablement and managed services automation. One of their notable offerings is the “MigrationWiz” tool, which is commonly used for email and data migration, including migrations to and from Microsoft 365 (Office 365).
Let’s begin with the steps to perform:
1: You need to have credentials ready for Microsoft 365 Tenant.
Source Tenant + Target Tenant
2: Since Basic Auth. is deprecated last in Dec 2022. You need to Register BitTitan Application in Azure to use Modern Auth.
Note: Make sure your Admin accounts should have Global Admin role.
Multi-Factor Authentication should be disabled.
Create Security Group in Office 365 with the name of MigrationWiz and add the Serviceaccount/GlobalAdmin as member before performing BitTitan Configuration.
- Login to https://Portal.azure.com
- Go to App. registration and follow the steps below:

- Here you need to enter the Application Name and Redirect URI : urn:ietf:wg:oauth:2.0:oob
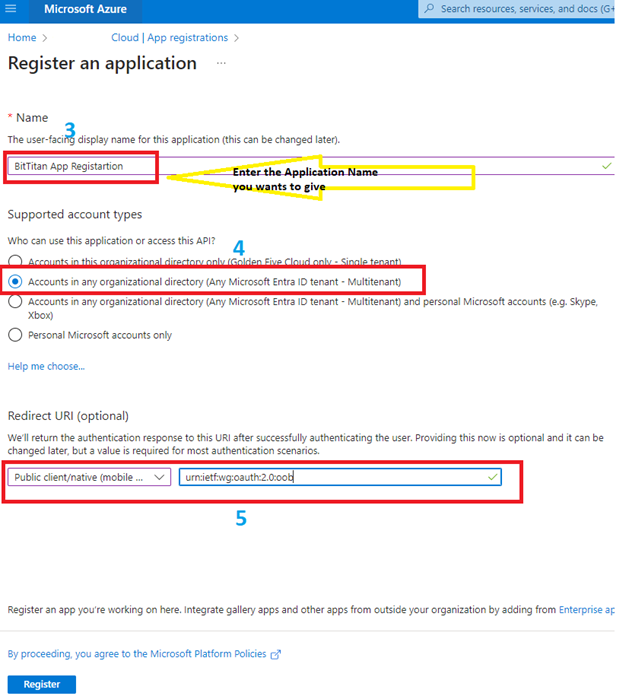
- Now click on register.
- Now once register go back to App. registration and look for the application name you created.
- Open the Application and click on Overview:
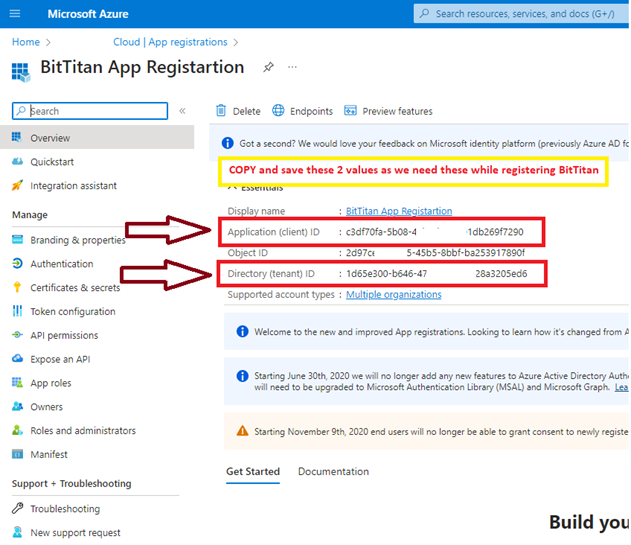
- Copy and paste the value in notepad for review.
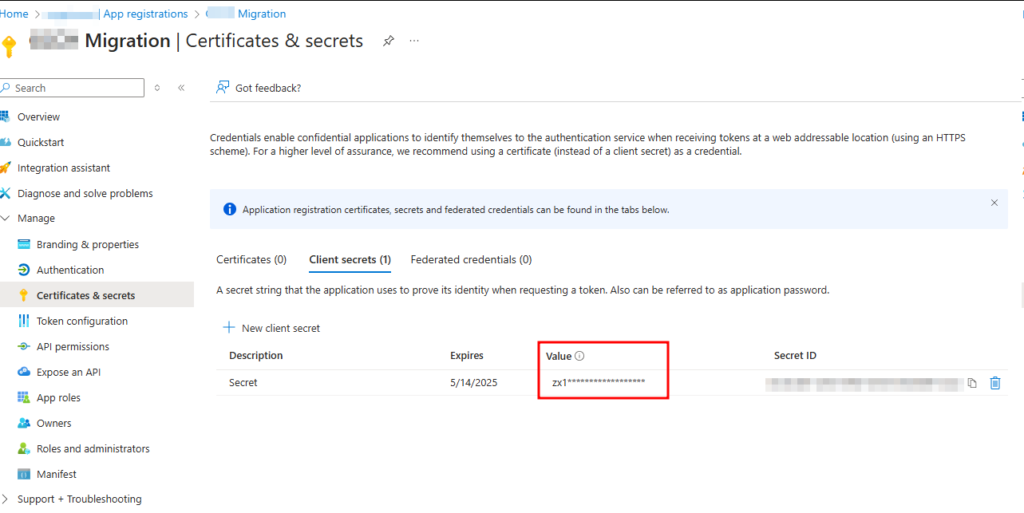
- Create Client Secret Key, then copy and paste it in notepad.
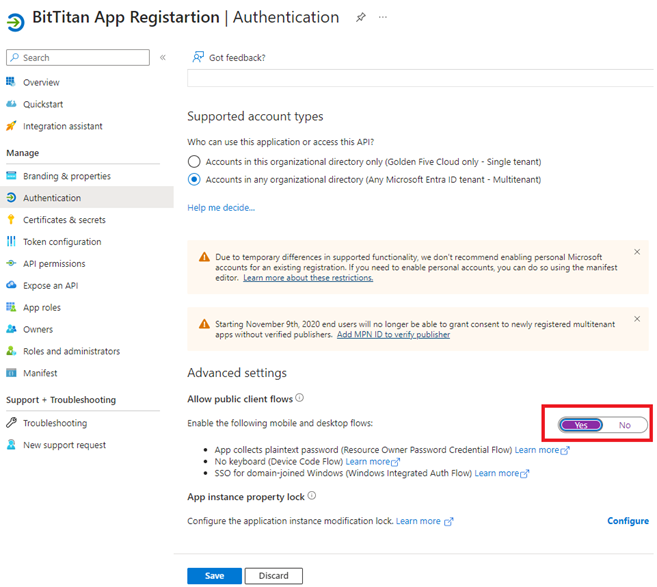
- Left side option Authentication, click on it and set the option to Yes as per below image and Save:
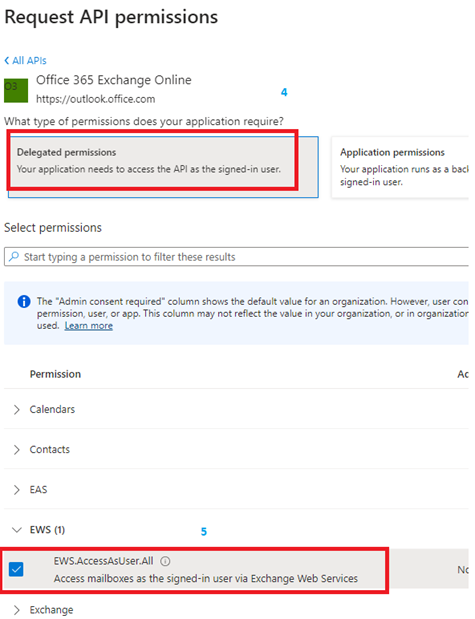
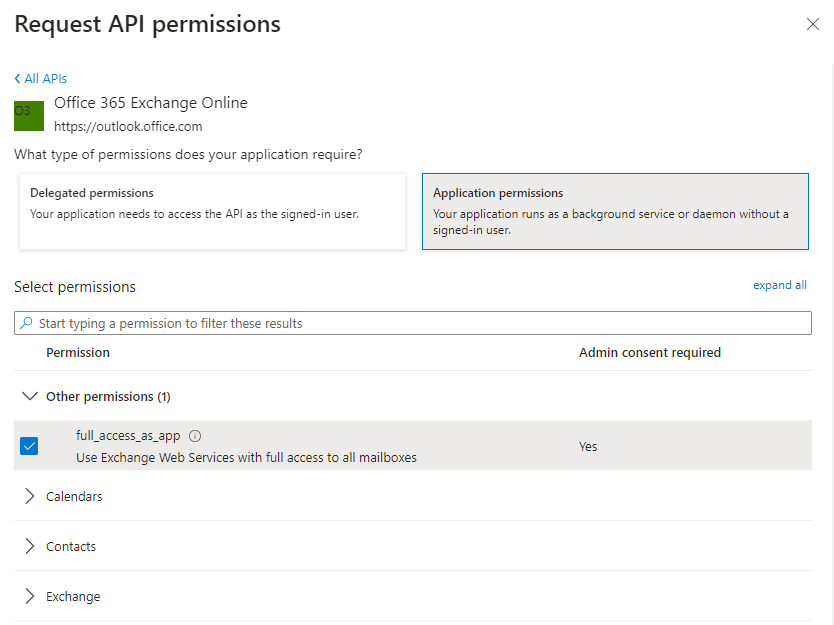
- Click on Add a Permission and follow the steps mentioned in below image:
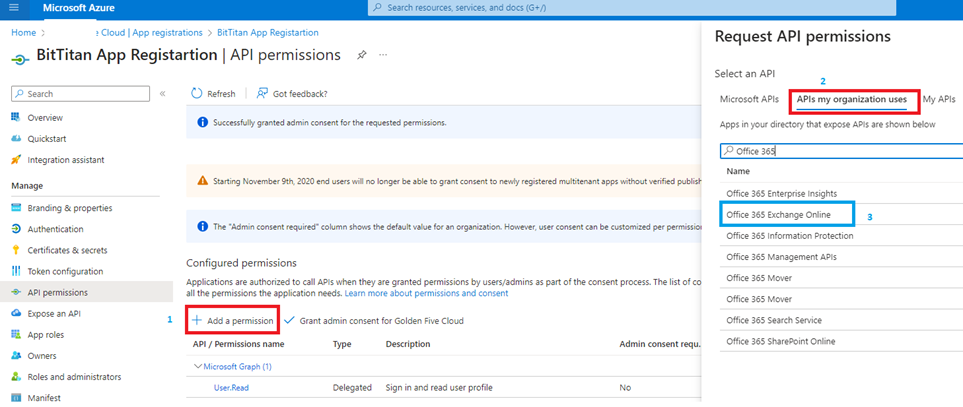
- Now, you need to give or grand the Admin consent permission as below:

3: We need to give UserImpersonation permission to the admin account to perform the task:
- Note: THIS PART IS NO LONGER REQUIRED Since MS Deprecated the ApplicationImpersonation
4: Login to Bititan in order to Create Project for the Migration
Select the type of migration you wants to do and proceed next and follow the on screen option.
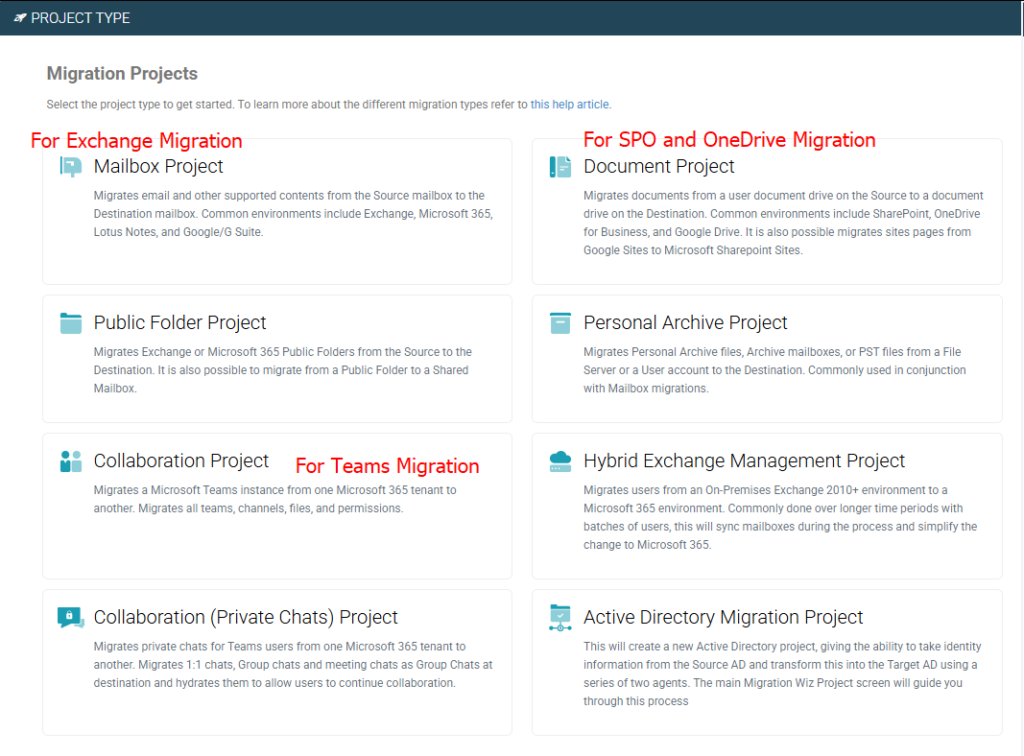
5: Lets assume I am doing Mailbox Migration
Create Project for EXO migration:
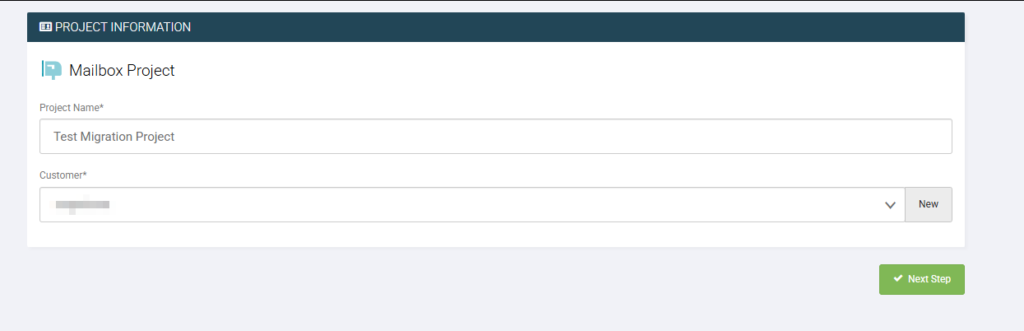
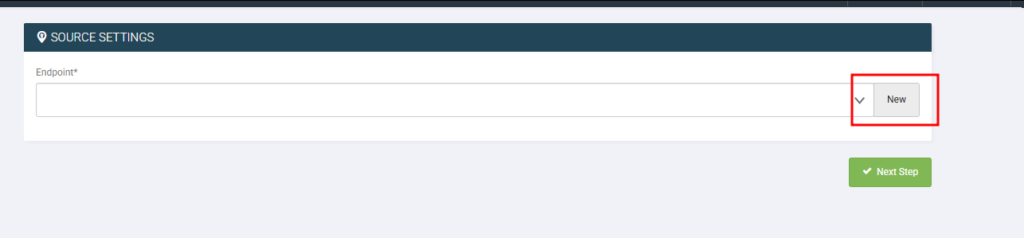
Select the type of migration you performing/source tenant type
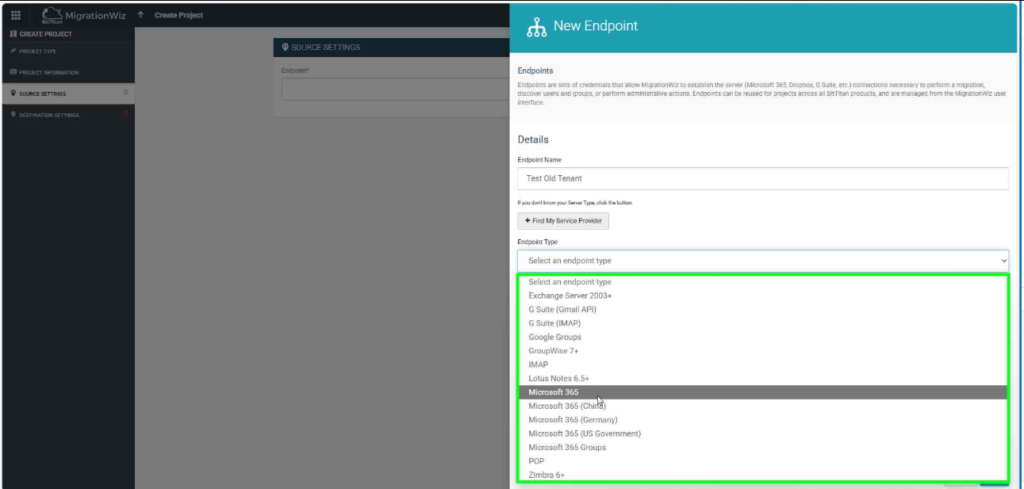
Enter the required cred.
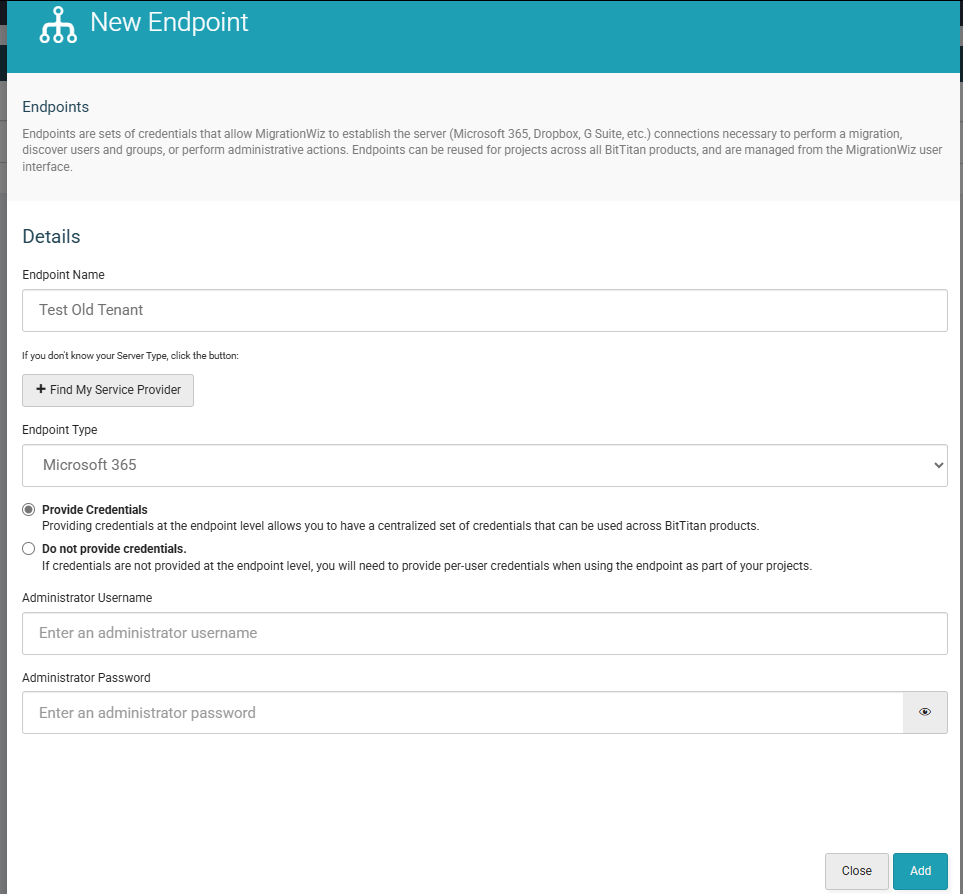

Similarly do it for destination Tenant:

Click on the Project and then do the Autodiscover to search the accounts on both tenant to migrate and Match.
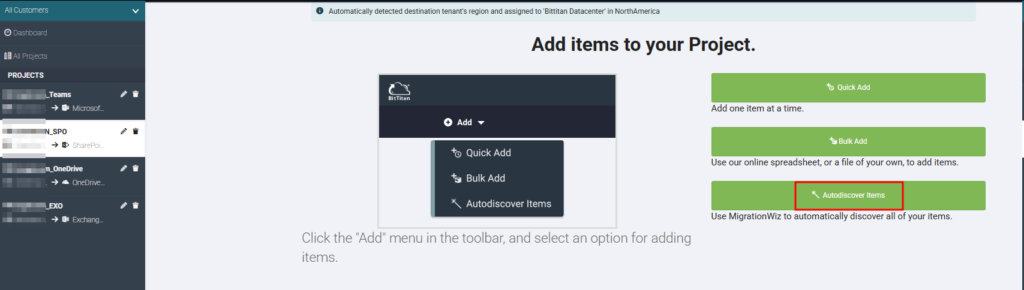
After this you can start the Migration as per your requirement. Pre-stage Migration/ Full Migration. This will only work when you have subscription active .
Above steps are important steps to configure the BitTitan for cross Tenant Migration in Microsoft 365. I will soon publish step by step migration process following BitTitan tool.
!!! THANKS FOR READING !!!
Regards,
HARISH KUMAR
Knowledge is not a finite resource to hoard; it’s a boundless treasure that grows when shared