In today’s digital landscape, ensuring a seamless Single Sign-On (SSO) experience for Office 365 and Azure users is critical. One of the key components to maintaining a secure and efficient SSO setup is the regular updating of SSL certificates on your Active Directory Federation Services (ADFS) and Web Application Proxy (WAP) servers. This blog will guide you through the process of updating your certificates, ensuring continued secure access for your users.
Why is Certificate Management Important?
Certificates play a crucial role in establishing trust between your ADFS server and clients. They are used to secure communications, sign tokens, and decrypt sensitive information. Expired or misconfigured certificates can lead to service disruptions, causing users to lose access to critical applications like Office 365 and Azure.
Pre-requisites
Before diving into the update process, make sure the following conditions are met:
- New Certificate Installation: The new SSL certificate, along with its private key, must be installed on your ADFS server(s).
- Certificate Thumbprint: Have the thumbprint of the new certificate ready, as it will be required in the PowerShell commands.
Step 1: Update the Service Communications Certificate on ADFS
The Service Communications Certificate is used to secure communications between clients and the ADFS server. To update this certificate, follow these steps:
PowerShell Commands:
$certThumbprint = “YourNewCertificateThumbprint”
# Set the new certificate as the service communications certificate
Set-AdfsCertificate -CertificateType Service-Communications -Thumbprint “YourNewCertificateThumbprint”
Replace “YourNewCertificateThumbprint” with the thumbprint of your new certificate. This command updates the SSL certificate used by ADFS to secure client connections.
Same you can do it from GUI as well if any doubt, just follow the below steps:
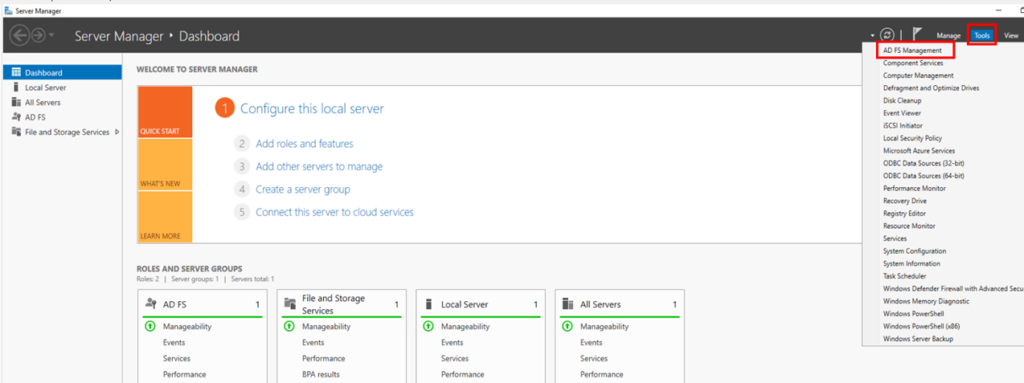
1: Login to ADFS server> GO to Server Manger > Tools> ADFS Management
2: Expand Service and right click on the certificates > Set Service communication certificate.
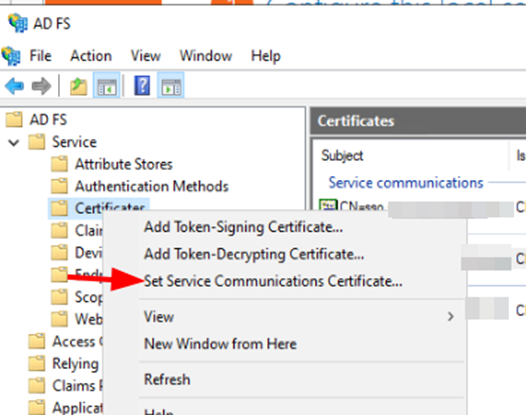
3: Now you will see all the certificates which ever is installe don ADFS, select the appropriate 1 and then click OK.

Step 2: Update Token Signing and Token Decryption Certificates (If Applicable)
Token Signing and Token Decryption certificates are used to sign and encrypt/decrypt security tokens. If these certificates also need updating, follow the steps below:
PowerShell Commands:
# Define the new token signing or decryption certificate
$certThumbprint = “YourNewCertificateThumbprint”
# Update the Token Signing Certificate
Add-AdfsCertificate -CertificateType “Token-Signing” -Thumbprint ”$certThumbprint”
Set-AdfsCertificate -IsPrimary -CertificateType “Token-Signing” -Thumbprint ”$certThumbprint”
# Update the Token Decryption Certificate
Add-AdfsCertificate -CertificateType “Token-Decrypting” -Thumbprint ”$certThumbprint”
Set-AdfsCertificate -IsPrimary -CertificateType “Token-Decrypting” -Thumbprint ”$certThumbprint”
It’s important to note that updating these certificates may require notifying relying parties, such as Office 365/Azure, if they need to trust the new signing or encryption certificates.
Same you can do it from the GUI also, this time you need to select the ADD Token for Signing certificate or Token Decrypting certificate to update:

Step 3: Update the Web Application Proxy Server
Your Web Application Proxy (WAP) server, which serves as the ADFS proxy, must also be updated with the new certificate. This ensures that external clients can continue to authenticate securely.
# Update the Web Application Proxy trust relationship
Install-WebApplicationProxy -CertificateThumbprint $certThumbprint -FederationServiceName “your_adfs_service_name”
Replace “your_adfs_service_name” with the Fully Qualified Domain Name (FQDN) of your ADFS service. This command updates the WAP server to trust the new ADFS certificate.
From GUI:
HKLM\Software\Microsoft\ADFS\ProxyConfigurationStatus
We need to set the ProxyConfigurationStatus REG_DWORD to a value of 1 (meaning “not configured”) instead of 2 (“configured”). Once that change made.
Go to Server Manager > Tools > Remote access Management >
Click on the Run the web application proxy configuration wizard and follow the on screen option to configure it.
Step 4: Restart Services and Verify Configuration
After updating the certificates, it’s crucial to restart the ADFS and WAP services to apply the changes:
Step 5: Update Certificate in Azure to work:
Now, update the certificate in cloud as well for federation to work properly:
1: Open PowerShell and connect to Connect-MsolService
2: Run this command on the Primary ADFS server
Set-MSOLADFScontext -computer <FQDN>
3: Run Update-MsolFederatedDomain -DomainName Domain.com
This command will update the ADFS configuration into the cloud.
Verify the Configuration:
Finally, verify that the correct certificates are in use and that the ADFS service is functioning as expected:
Get-AdfsSslCertificate
Get-AdfsCertificate
These commands will display the current certificates being used by ADFS. Ensure that the thumbprints match the new certificates.
Conclusion
By following these steps, you can ensure that your ADFS and Web Application Proxy servers are updated with the latest certificates, maintaining a secure and seamless SSO experience for your Office 365 and Azure users. Regular certificate updates are a best practice that helps prevent service disruptions and security vulnerabilities.
Make sure to schedule these updates during maintenance windows to minimize any potential impact on users. With the right preparation and execution, you can manage your ADFS environment effectively and keep your SSO infrastructure running smoothly.
!!! THANKS FOR READING !!!
Regards,
HARISH KUMAR
Knowledge is not a finite resource to hoard; it’s a boundless treasure that grows when shared.